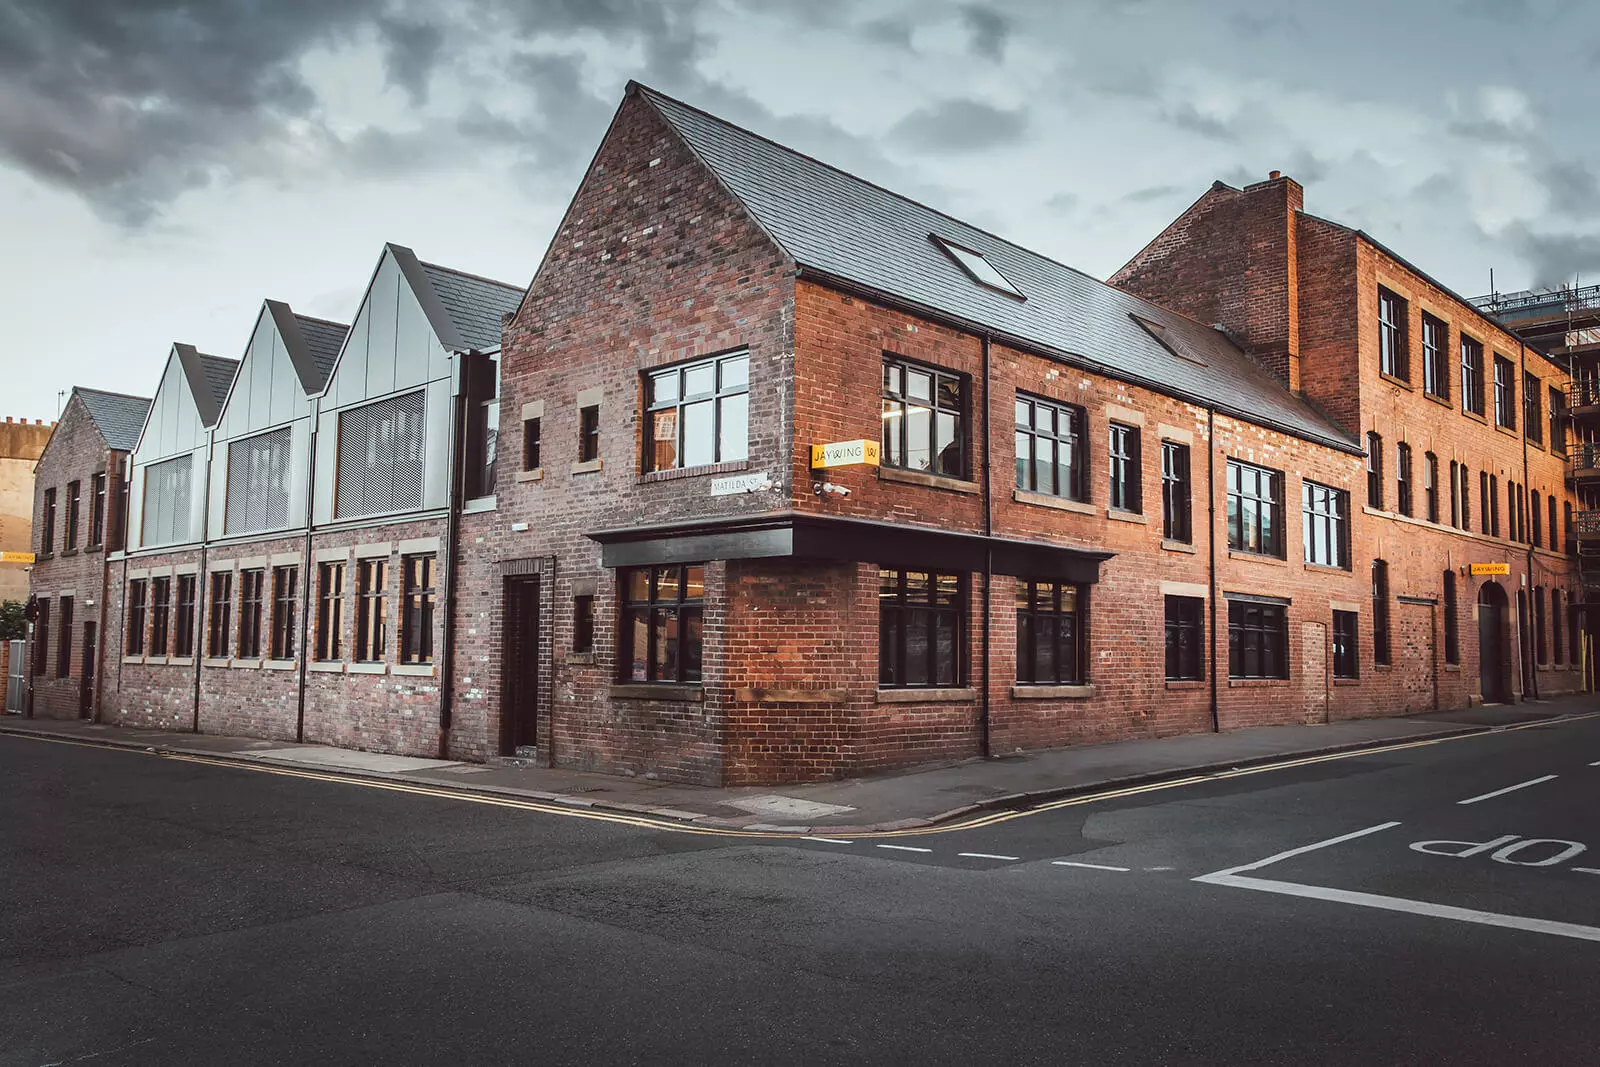
Last year Jaywing announced that their headquarters, based in Attercliffe, Sheffield for the last 17 years, would be moving to a brand new building in the city centre.
Our dev team was tasked with creating something to document the process, viewable by everyone in the company to see the progression over the coming months. This was an exciting side project with a fair amount of challenges; the new office was an active building site without any infrastructure in place, including WiFi or power. (We later managed to get an electrician to wire us up a power socket). The office was the other side of Sheffield, and there was nobody to maintain the hardware, everything had to be controlled remotely.
Initially, the idea was simply to provide a live feed of the site, but we soon realised that this would get boring, and it would be difficult to see the progress each day, without regularly checking it and remembering how looked before. We decided the best output of the project would be to show a timelapse of the site from day 1, up until the present date. The video needed to be regenerated every time a new frame was available.
The Hardware
We settled on a list of the required components, made the order, and the items started to arrive over the following days.
- Raspberry Pi 3 (Plus customary Pimoroni Pibow coupe case)
- 500Gb USB Drive
- Waterproof Project Box
- Tripod Ballhead mount – Link
- Three Wifi Router + Sim Card – Available here
The Software
In the end, the idea was simple: take a photo every X seconds, store it locally on the hard drive, as well as uploading it to a remote server, to be compiled into the timelapse video.
We couldn’t guarantee that the device would have a solid network connection each time a photo was taken, and FTPing all the files each time just in case wasn’t a sensible option. We settled on Rsync as it compresses all network data and only transfers changed files. This uses minimal data, preserving our 3G allowance.
We trialled a couple of basic prototypes running directly on the Pi via SSH, then we discovered resin.io:
“Resin.io brings the benefits of Linux containers to the IoT. Develop iteratively, deploy safely, and manage at scale.”
Resin lets you run a Docker image defined in a Git repo, across multiple (1 - thousands) devices. Each device has an agent that talks to Resin and pulls down the latest changes after detecting new commits. The major feature for us, a Pi on a 3G network would keep getting a new IP address regularly, and it was impossible to request a static IP. We could have written a script that pulls code from the server on a cron, however this would mostly be a one way communication. With Resin, we didn’t need to worry about what the IP address was, but we could also still SSH to the device via the terminal on the control panel.
The setup process was simple:
- Log in to resin
- Create a project
- Download the generated SD card image (with preconfigured WiFi details!)
- Boot up the Pi
- Push your project and Dockerfile to the Resin Git remote
- Watch it deploy to your device
You can then add as many devices as you want, it would have been simple for us to create multiple camera boxes and deploy to all devices simultaneously with one command, using Resin.
Resin worked perfectly, and I think I can safely say that without it, the project would have died half way through.
We only fully realised this, several weeks after deploying the box. For some reason, the hard drive failed and photos were no longer being saved. This meant that nothing could be rsync’ed either, the entire thing had died. (Or so we thought.) Had we have just written a Node.JS application that starts on boot, the project would probably have died then and there. We couldn’t drive to the other side of Sheffield to investigate, and even if we could, the box was sealed and the camera would have to be moved, compromising the entire timelapse to date. Resin has the tools to remotely monitor the logs of each device, meaning we could see that the hard drive wasn’t working. We even tried rebooting the Pi, which fixed it for 5 minutes, but then it died again.
Eventually, we wrote an update to the docker file that disabled the hard drive, and updated our application to write to the 8GB SD card instead. Using Resins terminal we were able to check the available storage space. Every week or so we could delete the files stored locally on the Pi, knowing they had been safely backed up to our timelapse server.
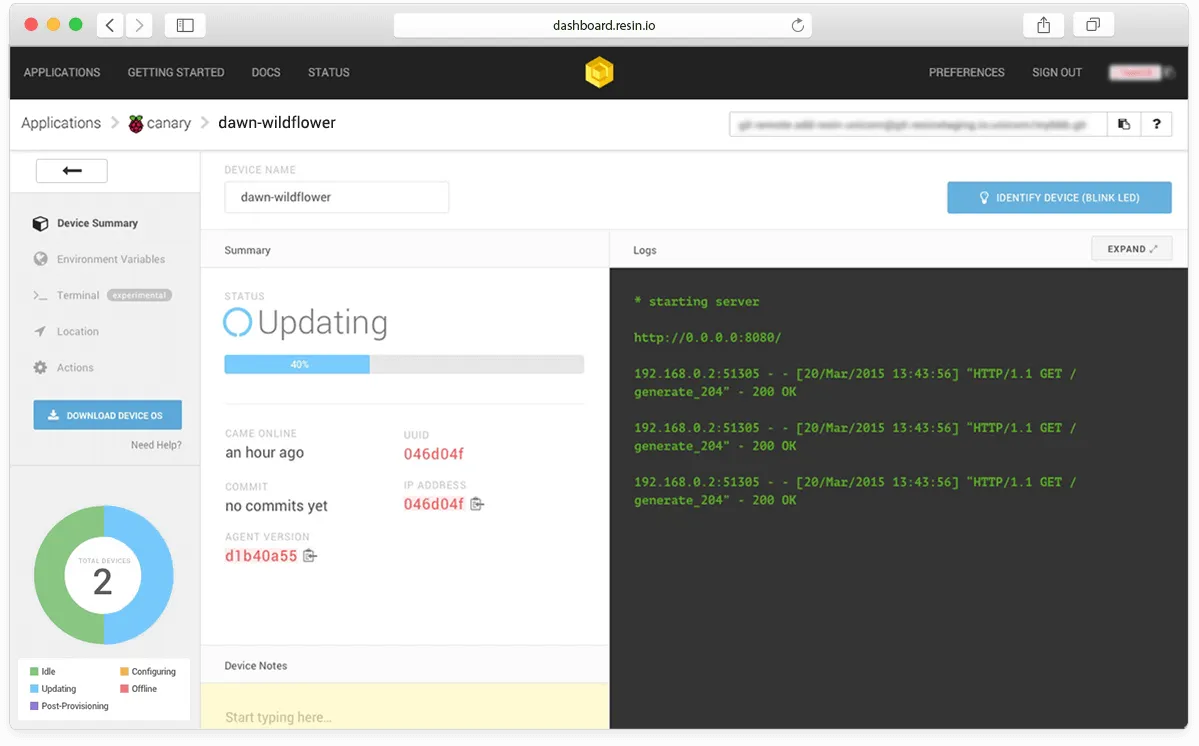
The Resin Dockerfile for the project is below, I’ve commented some key parts and added some notes:
Click here to view the Dockerfile
FROM resin/%%RESIN_MACHINE_NAME%%-node:slim

# switch on systemd init system in container
ENV INITSYSTEM on

COPY . /usr/src/app
WORKDIR /usr/src/app

# Copies the package.json first for better caching on later pushes
COPY package.json package.json

# Run npm install and clear the cache after, to save space
RUN JOBS=MAX npm install --production --unsafe-perm && npm cache clean && rm -rf /tmp/*

# Originally, we mounted the USB disk, this was eventually removed
COPY mount /etc/systemd/system/mnt-usbdisk.mount
RUN systemctl enable mnt-usbdisk.mount

# This will copy all files in our root to the working directory in the container
COPY . ./

# The exfat formatting later turned out to be a big issue which killed our disk
RUN apt-get -q update && apt-get dist-upgrade && apt-get -y install exfat-fuse exfat-utils libraspberrypi-bin ssh rsync ftp && rm -rf /tmp/* && apt-get autoclean

# Run the start command, defined in our package.json
CMD ["npm", "start"]
The Node.js file itself simply used node-raspicam, taking a photo on an interval defined in a Resin environment variable (so we could update it, without having to deploy new versions).
// Take a photo on load
takePhoto();
setInterval(() => {
    // Take a photo every X minutes, defined in the ENV
    takePhoto();
}, 1000 * 60 * parseInt(process.env.PHOTO_INTERVAL, 10));
The Process
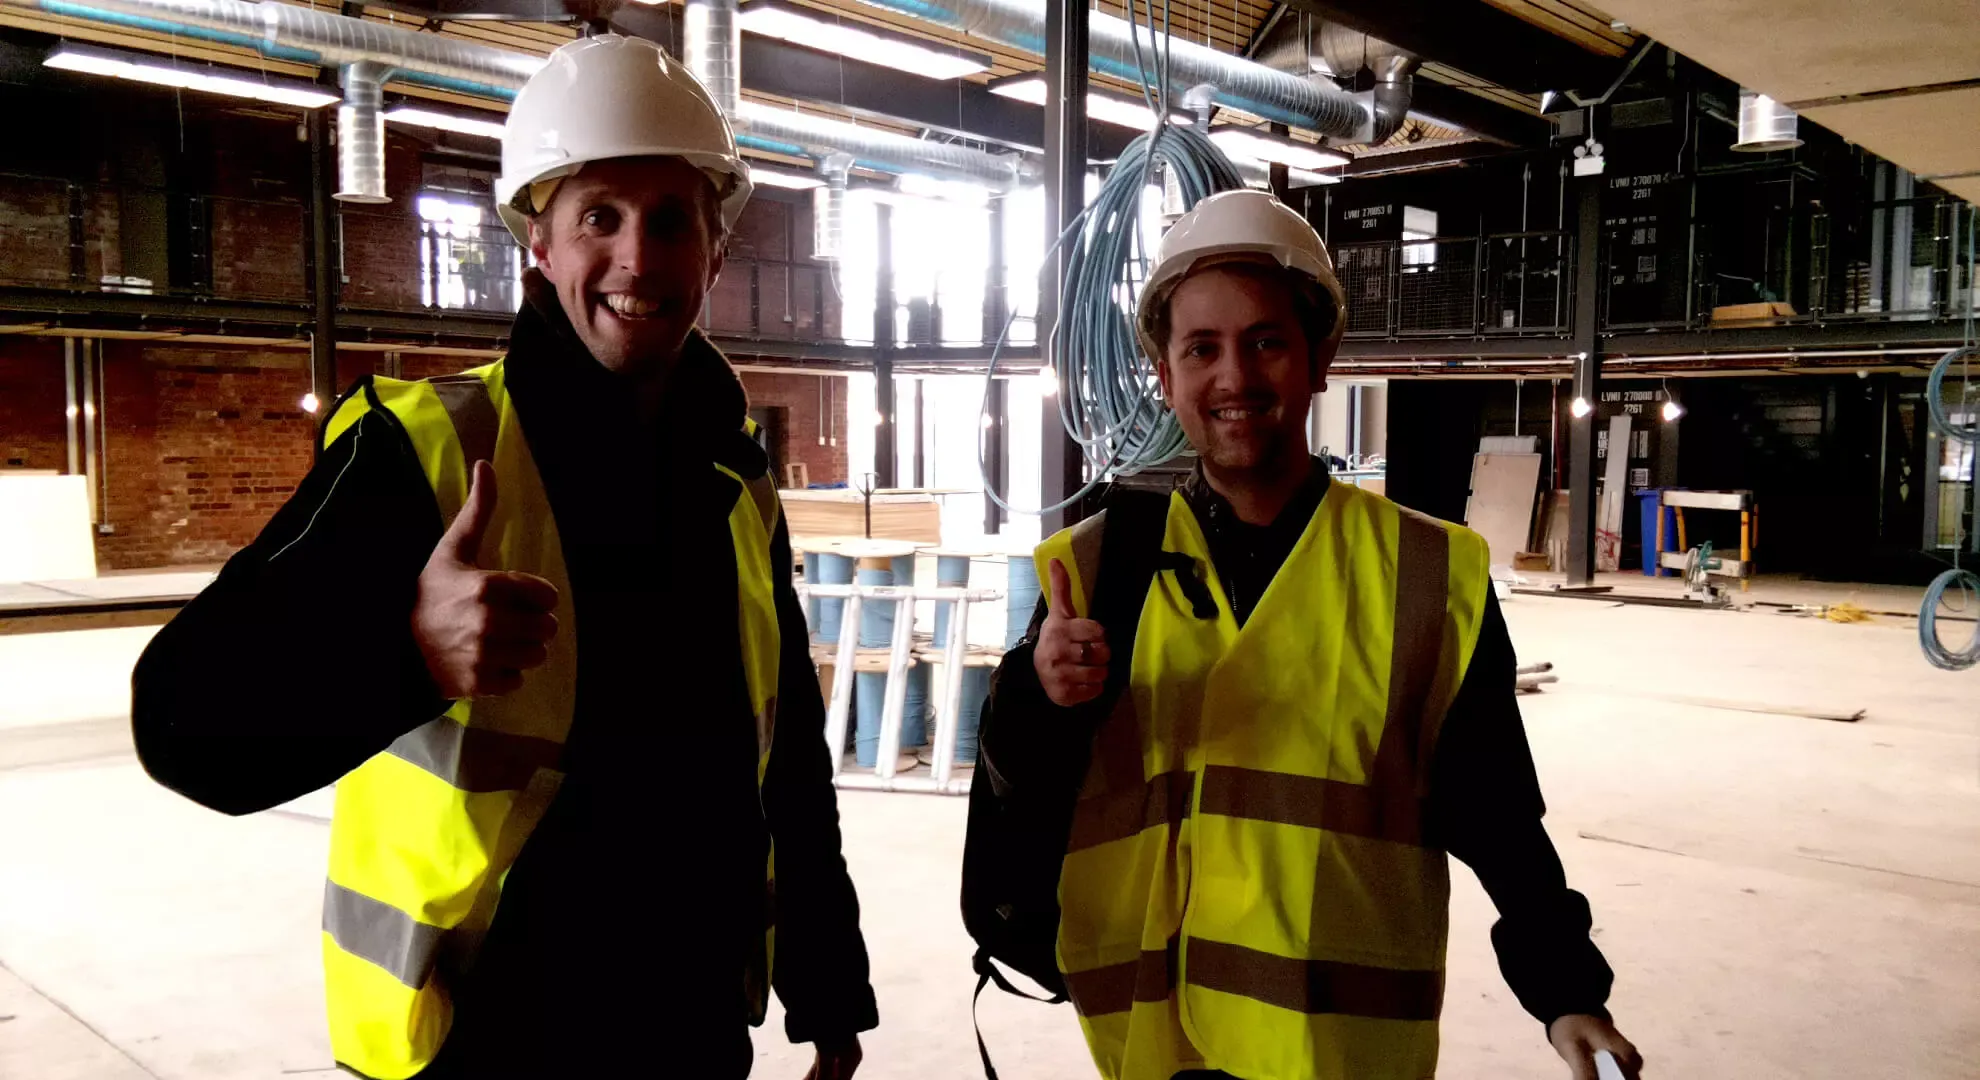
Initially, a couple of us headed over to the new office building site to find the best viewing angle.
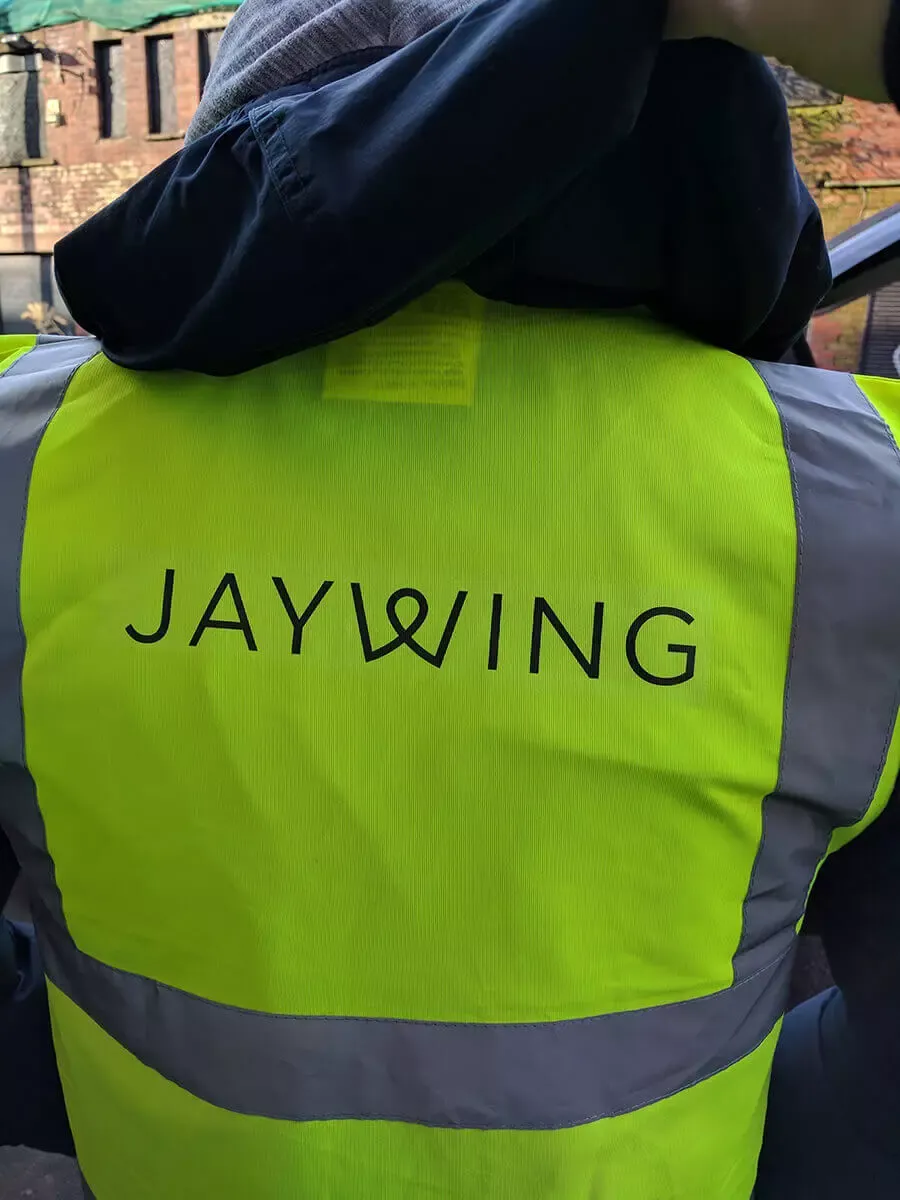 Our rather fetching Jaywing hi-vis’
 The early stages of the studio
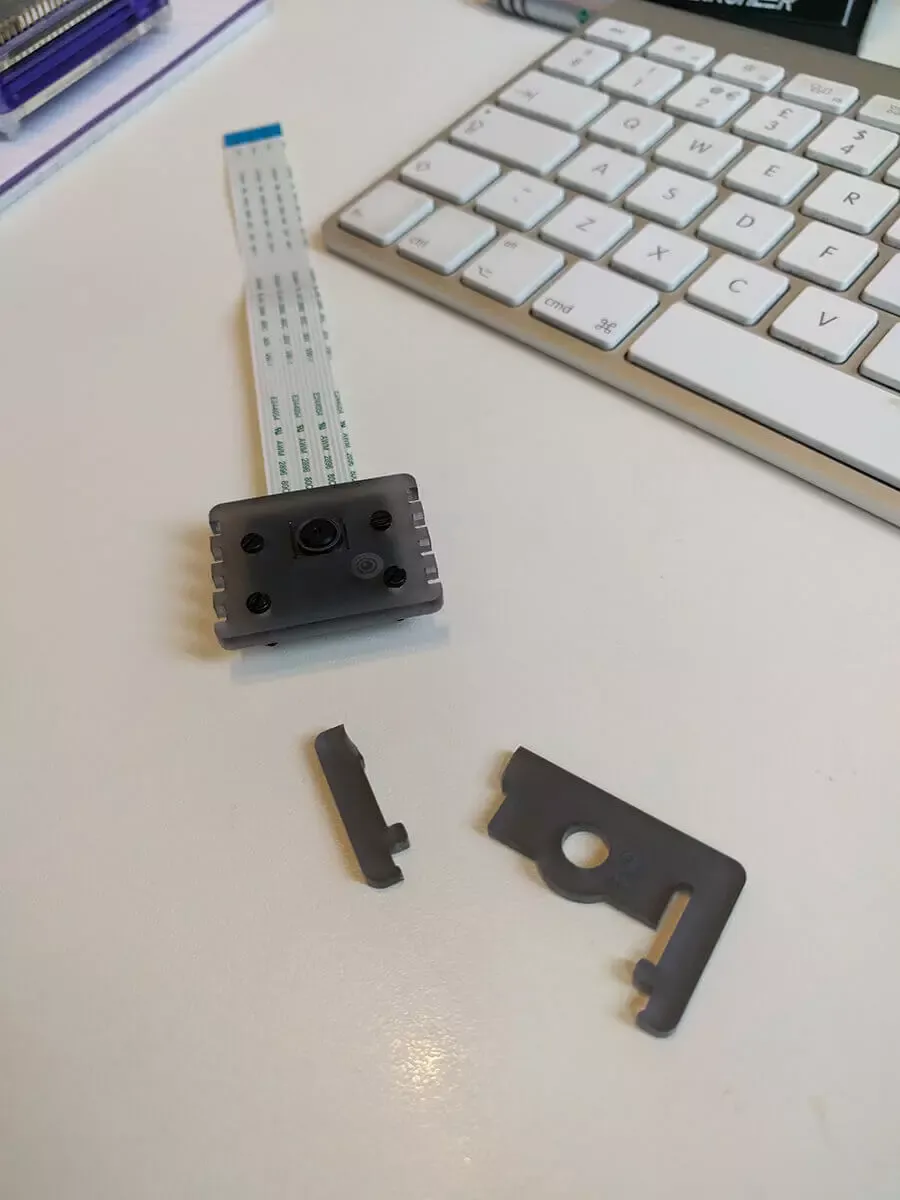
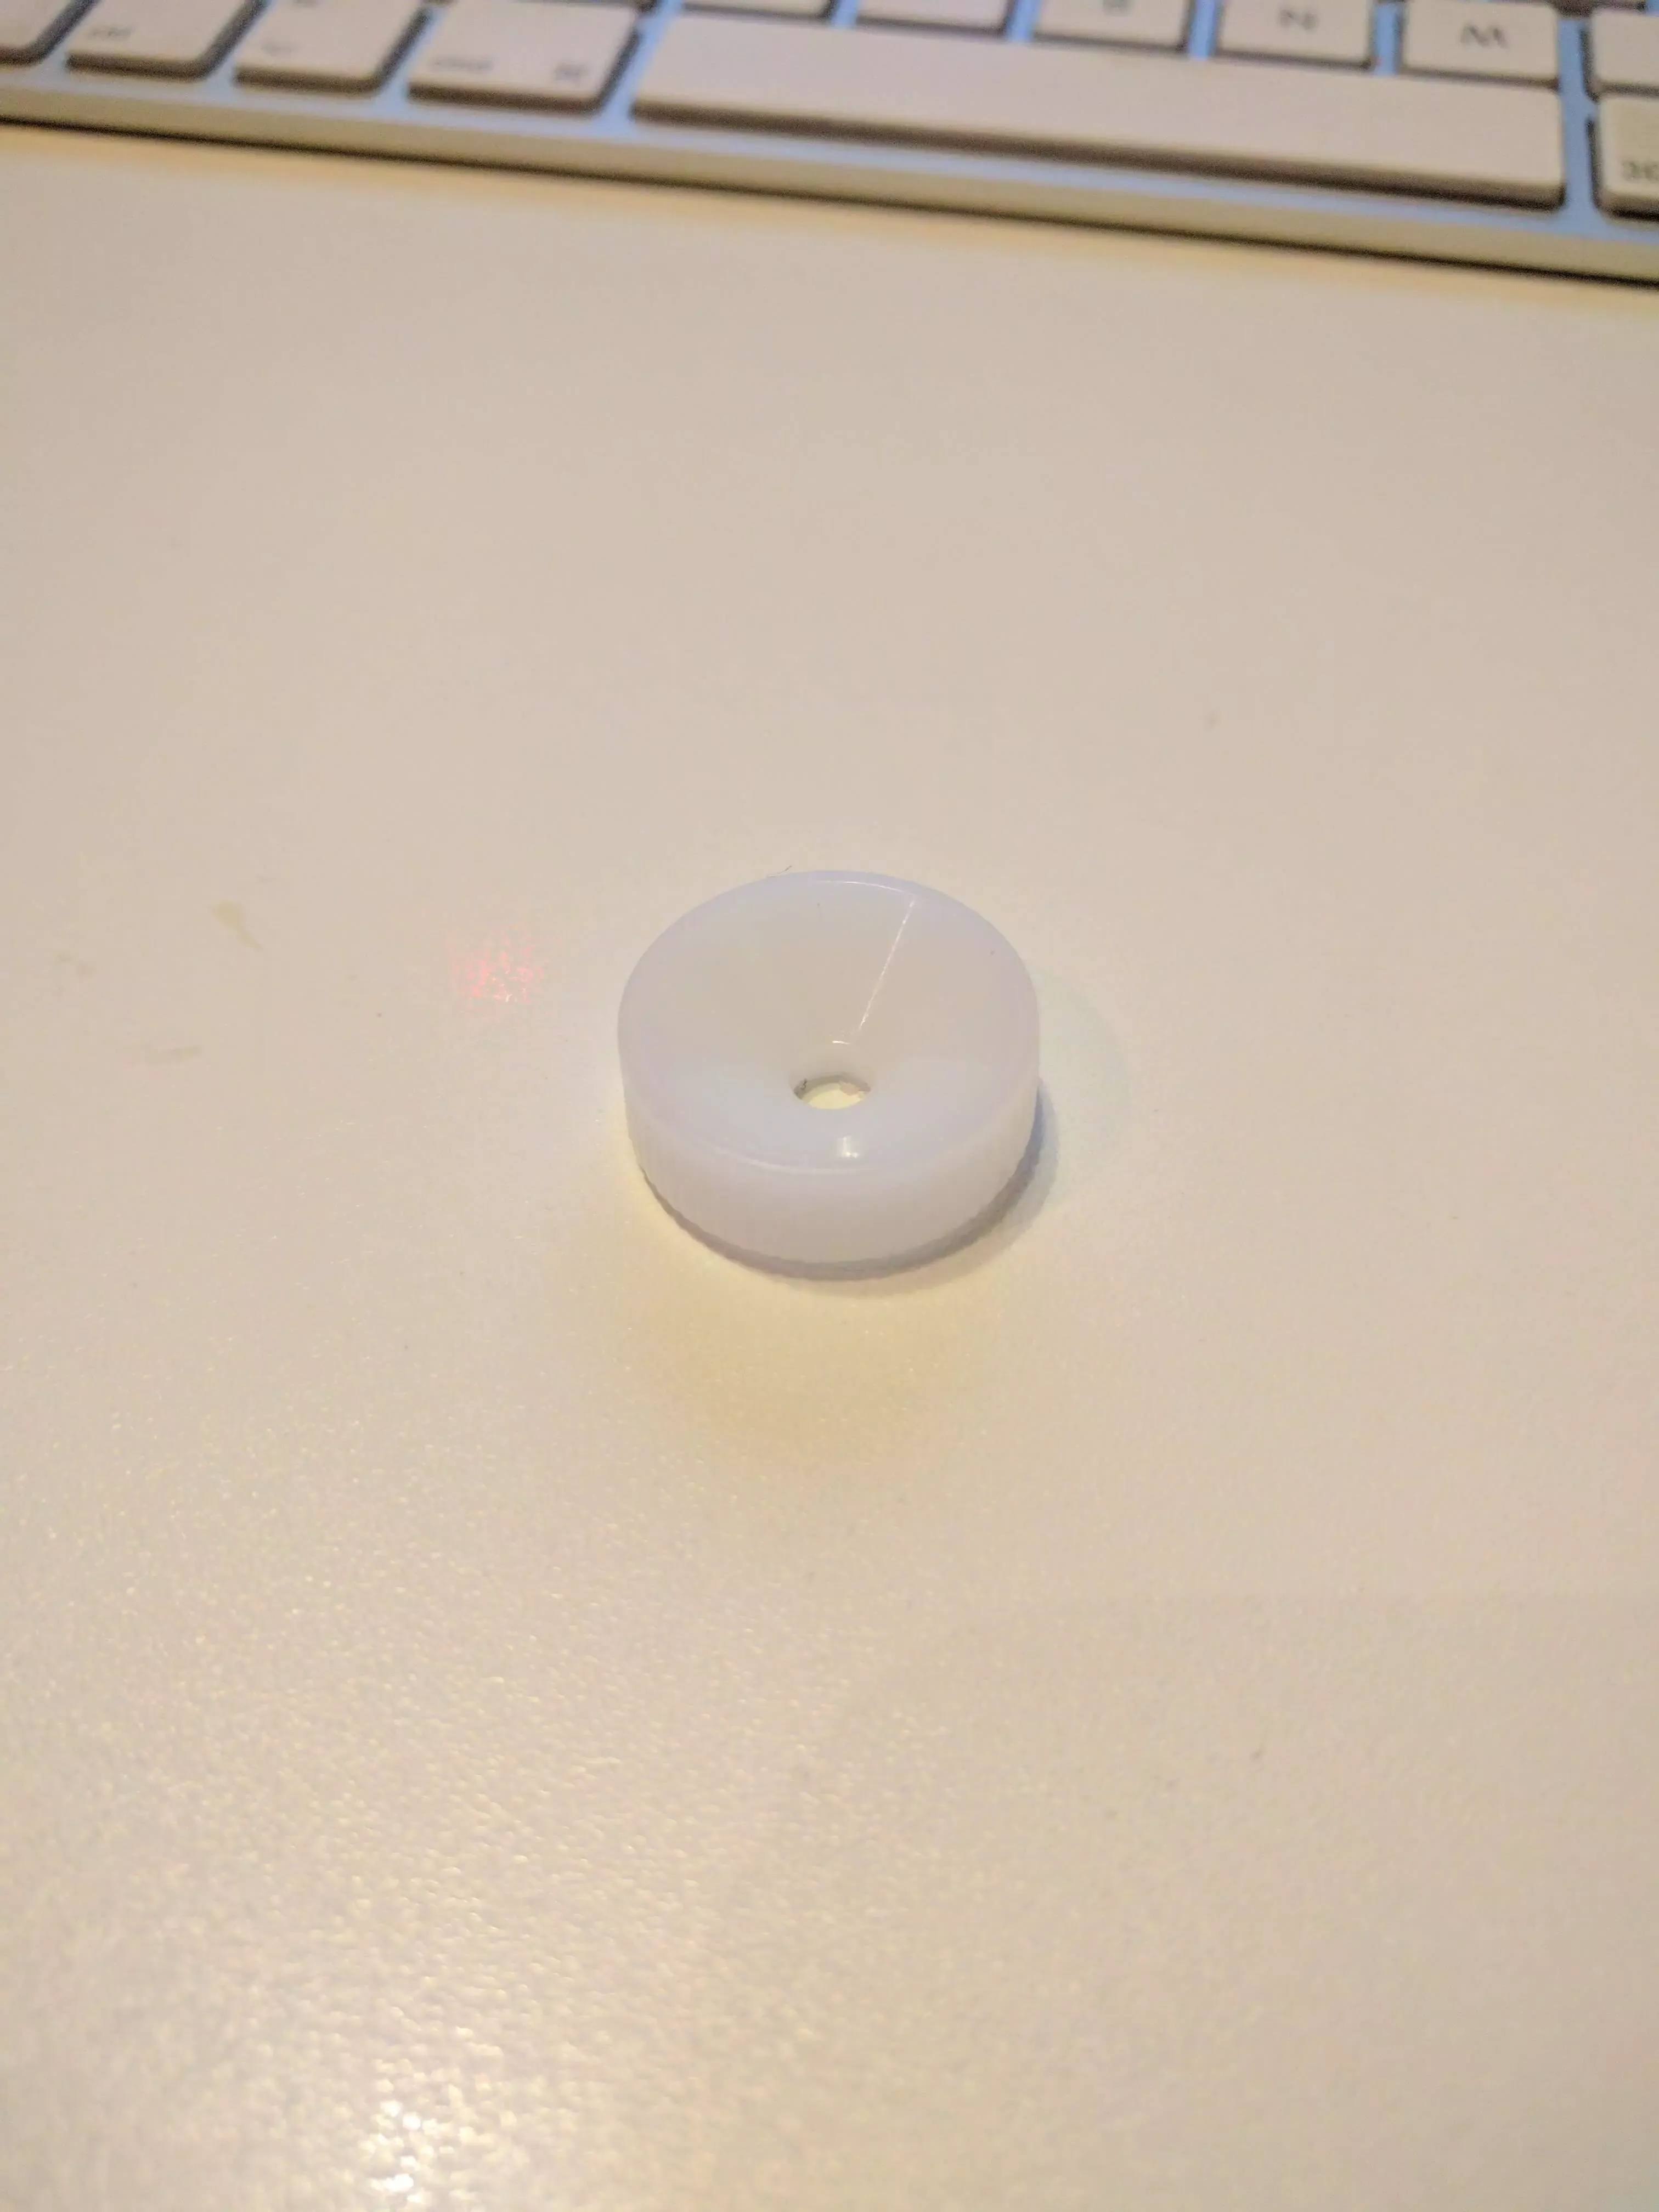 (Handy tip, I couldn’t work out what this piece of plastic was, it turns out it’s for adjusting the focus of the Pi camera lens)
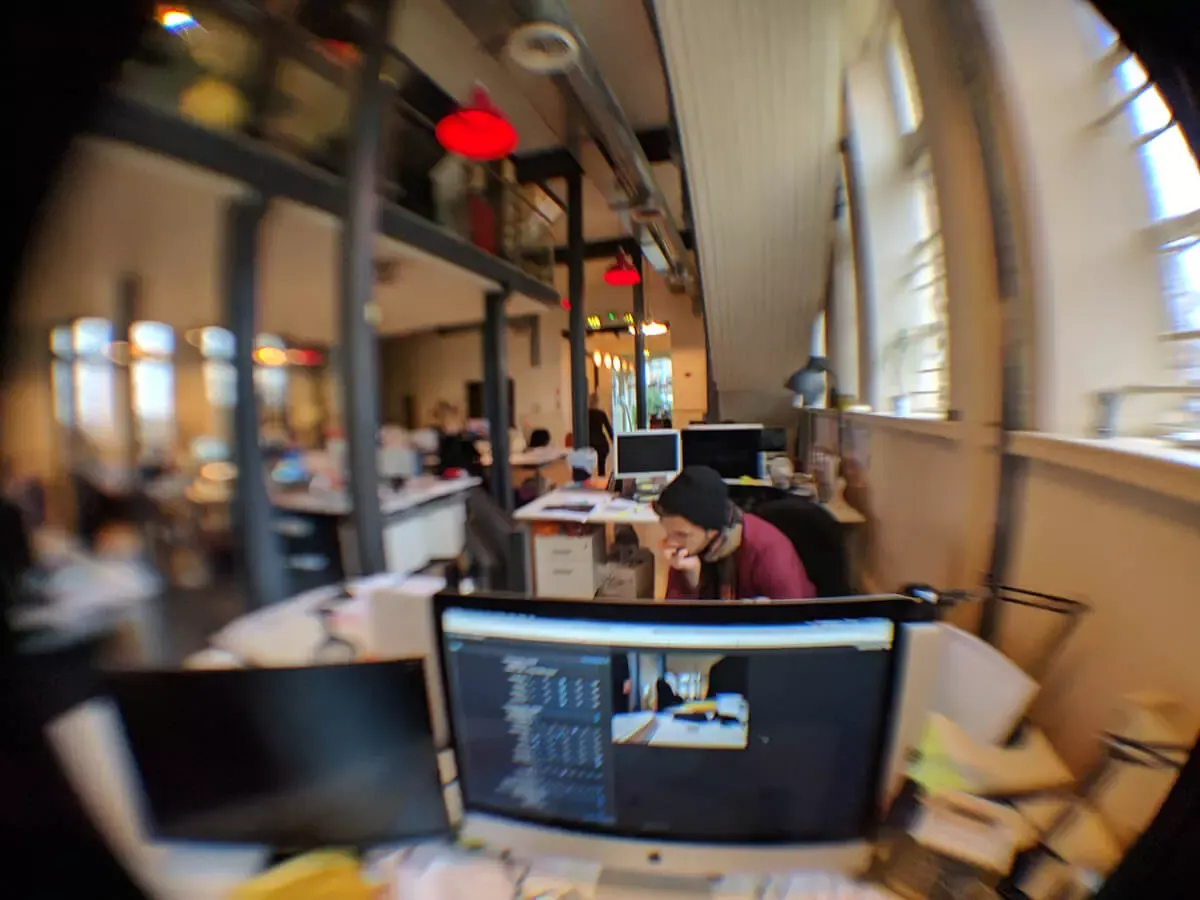 I thought a fish eye lense might improve the images, however the distortion outweighted the extra field of view, so we scrapped this idea.
 A couple of days later the 3G router arrived. You can also see the camera attached to the ball joint, on the left
 I soon snapped the Pi camera mount provided by Pimoroni, luckily, their service is excellent and they immediately sent over another free of charge.
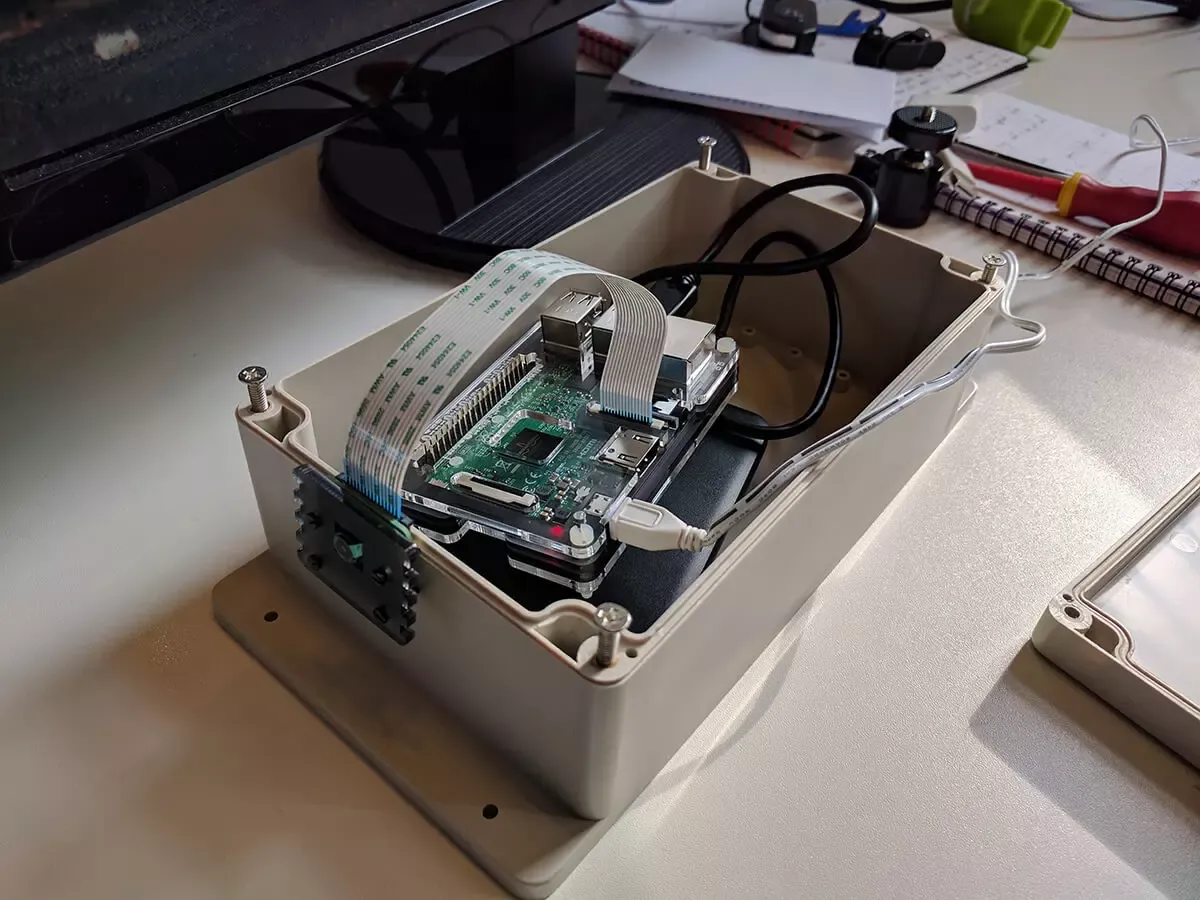
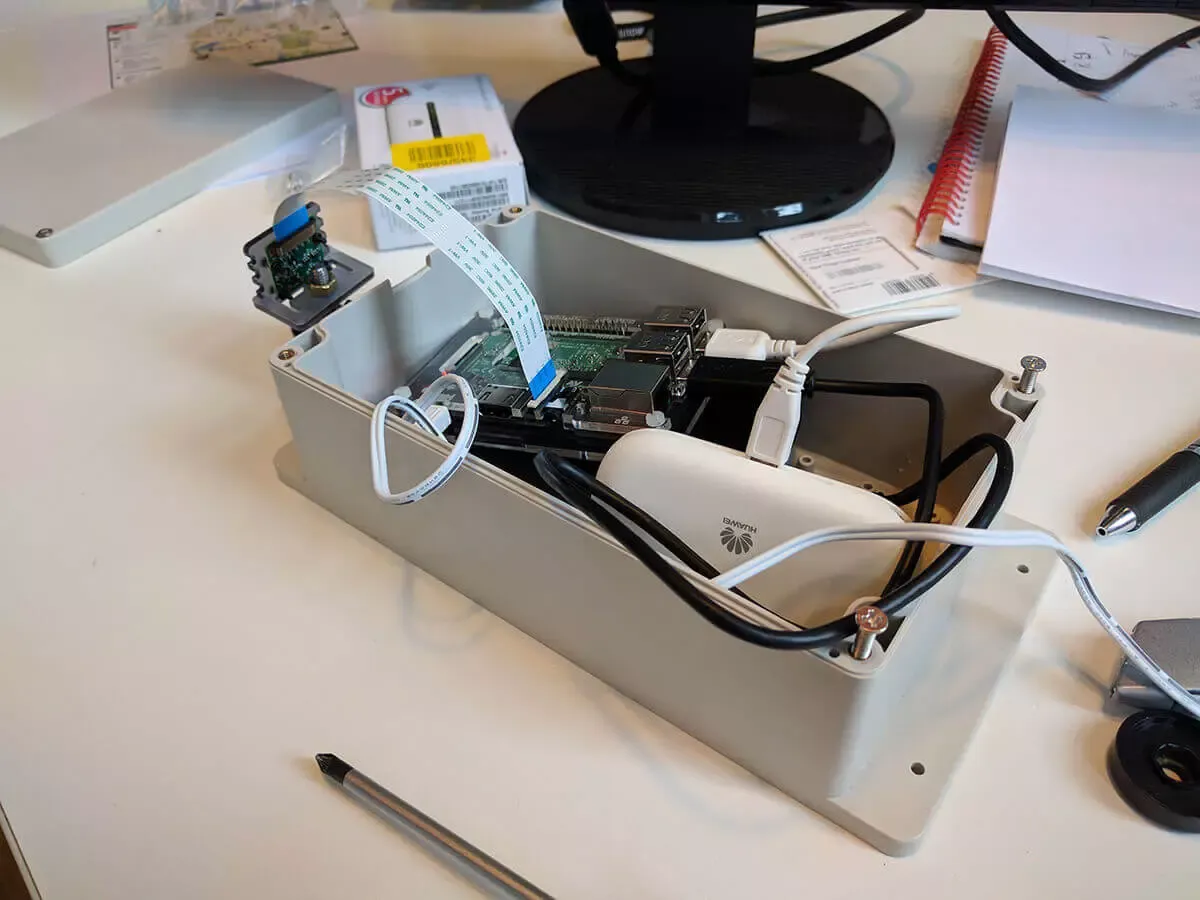
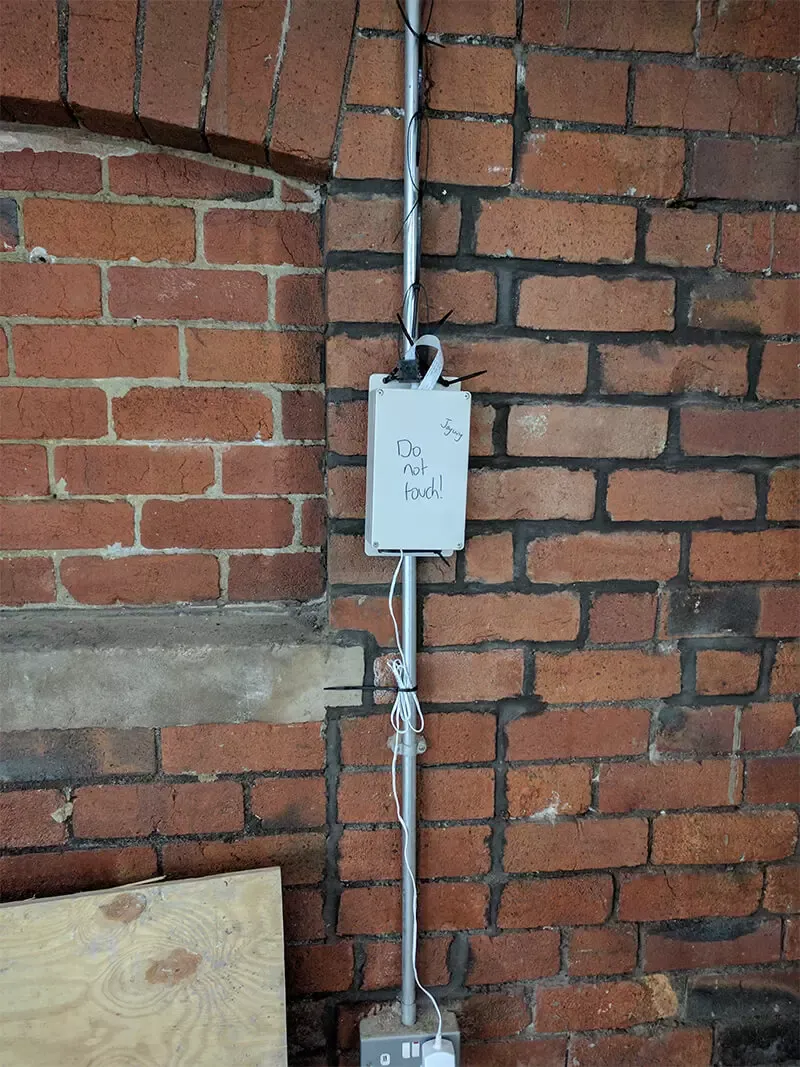
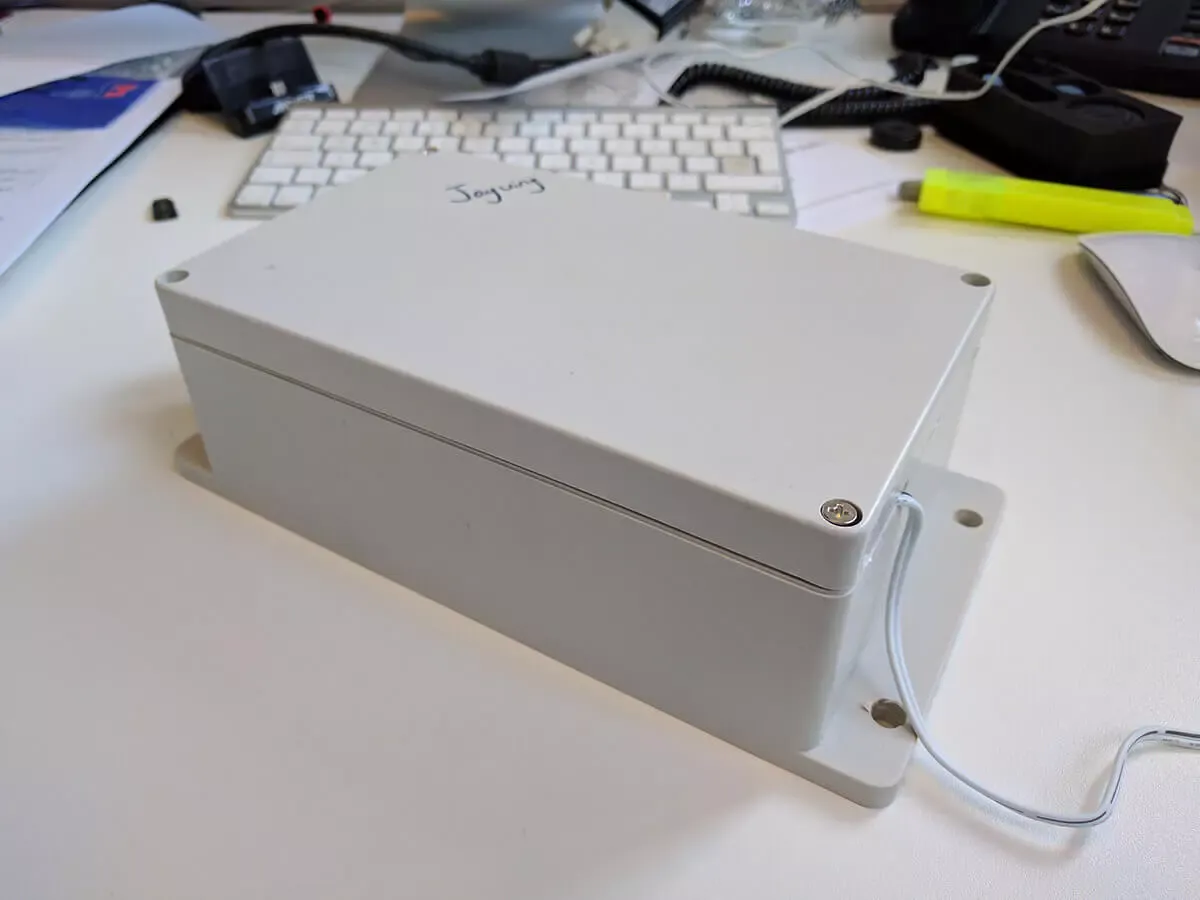 Once the parts were assembled and sealed…
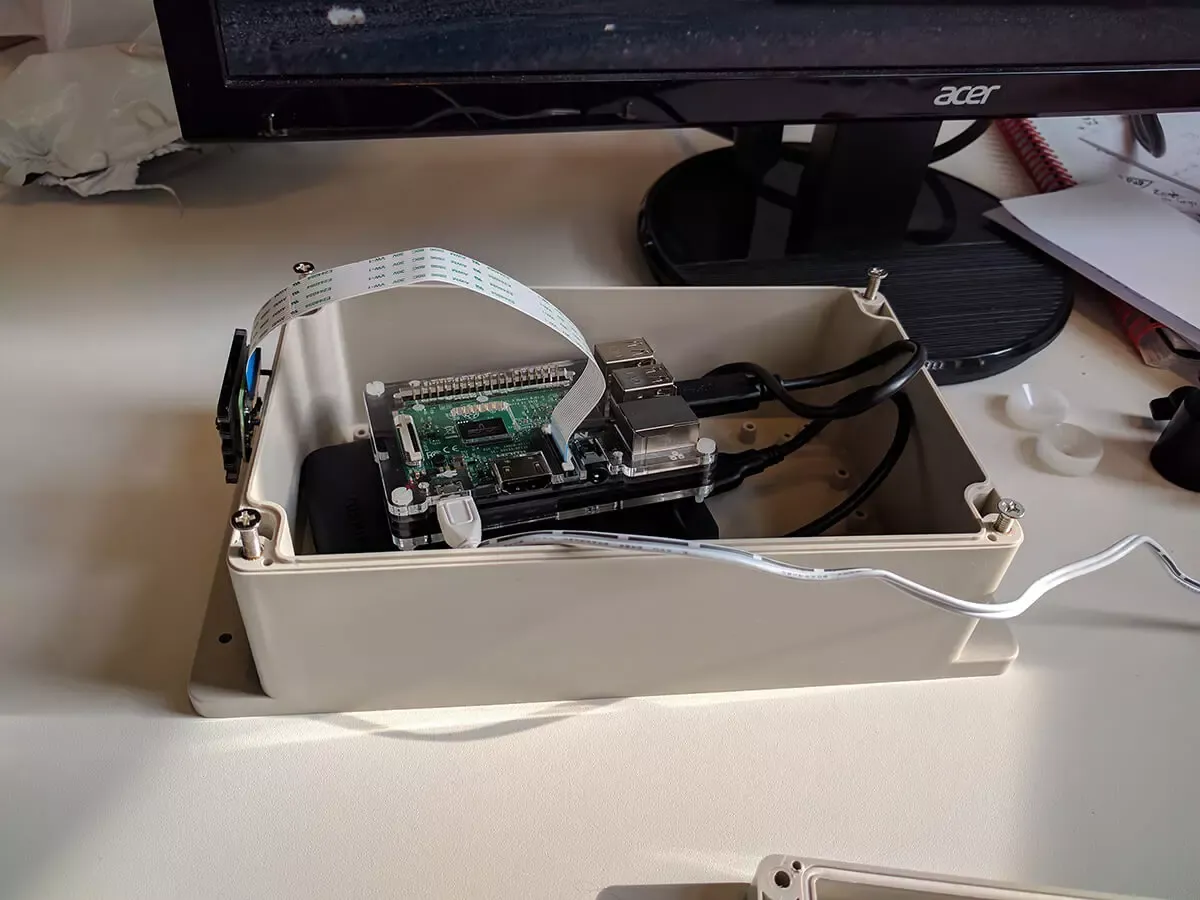
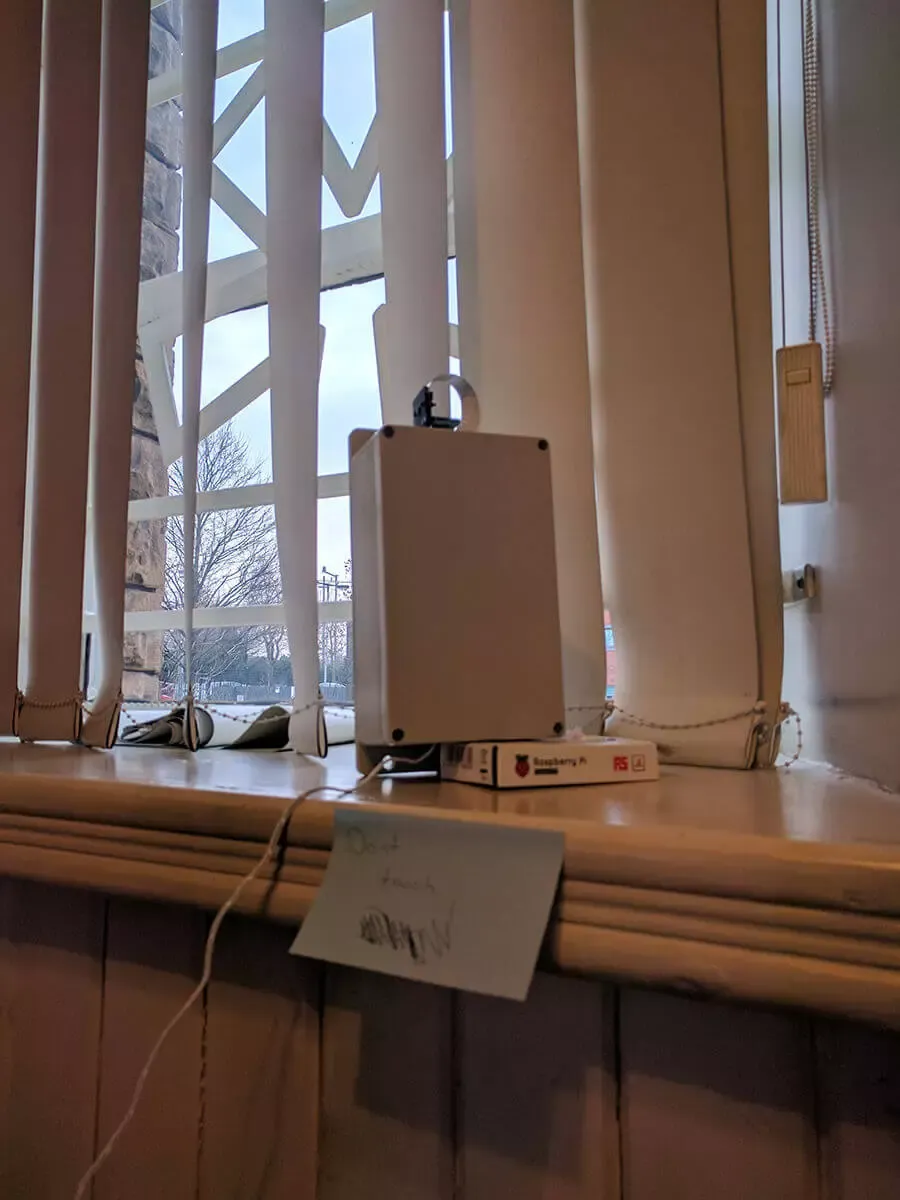 …we placed it on a window and left it for the weekend. The results were great.
 Us, after fitting the Pi box
The final timelapse can be viewed below, I’ve mirrored the video on YouTube, originally it was hosted on a site also showing off posts tagged with #AlbertWorks from Twitter and Instagram.
Afterwards, I was asked what it would take to do it again, since the Pi Zero W has been released, along with the official camera case, we’d be able to make a version at half the cost, and a fraction of the size.

This project has been one of the most interesting that I’ve been able to do so far. Mixing hardware with software, combined with the huge challenges of having to deploy it in remote conditions. We ended up with a camera that could be deployed anywhere in the world with a single power socket and a bit of network coverage, that could remotely send the photos back, and be monitored, controlled and updated within seconds.
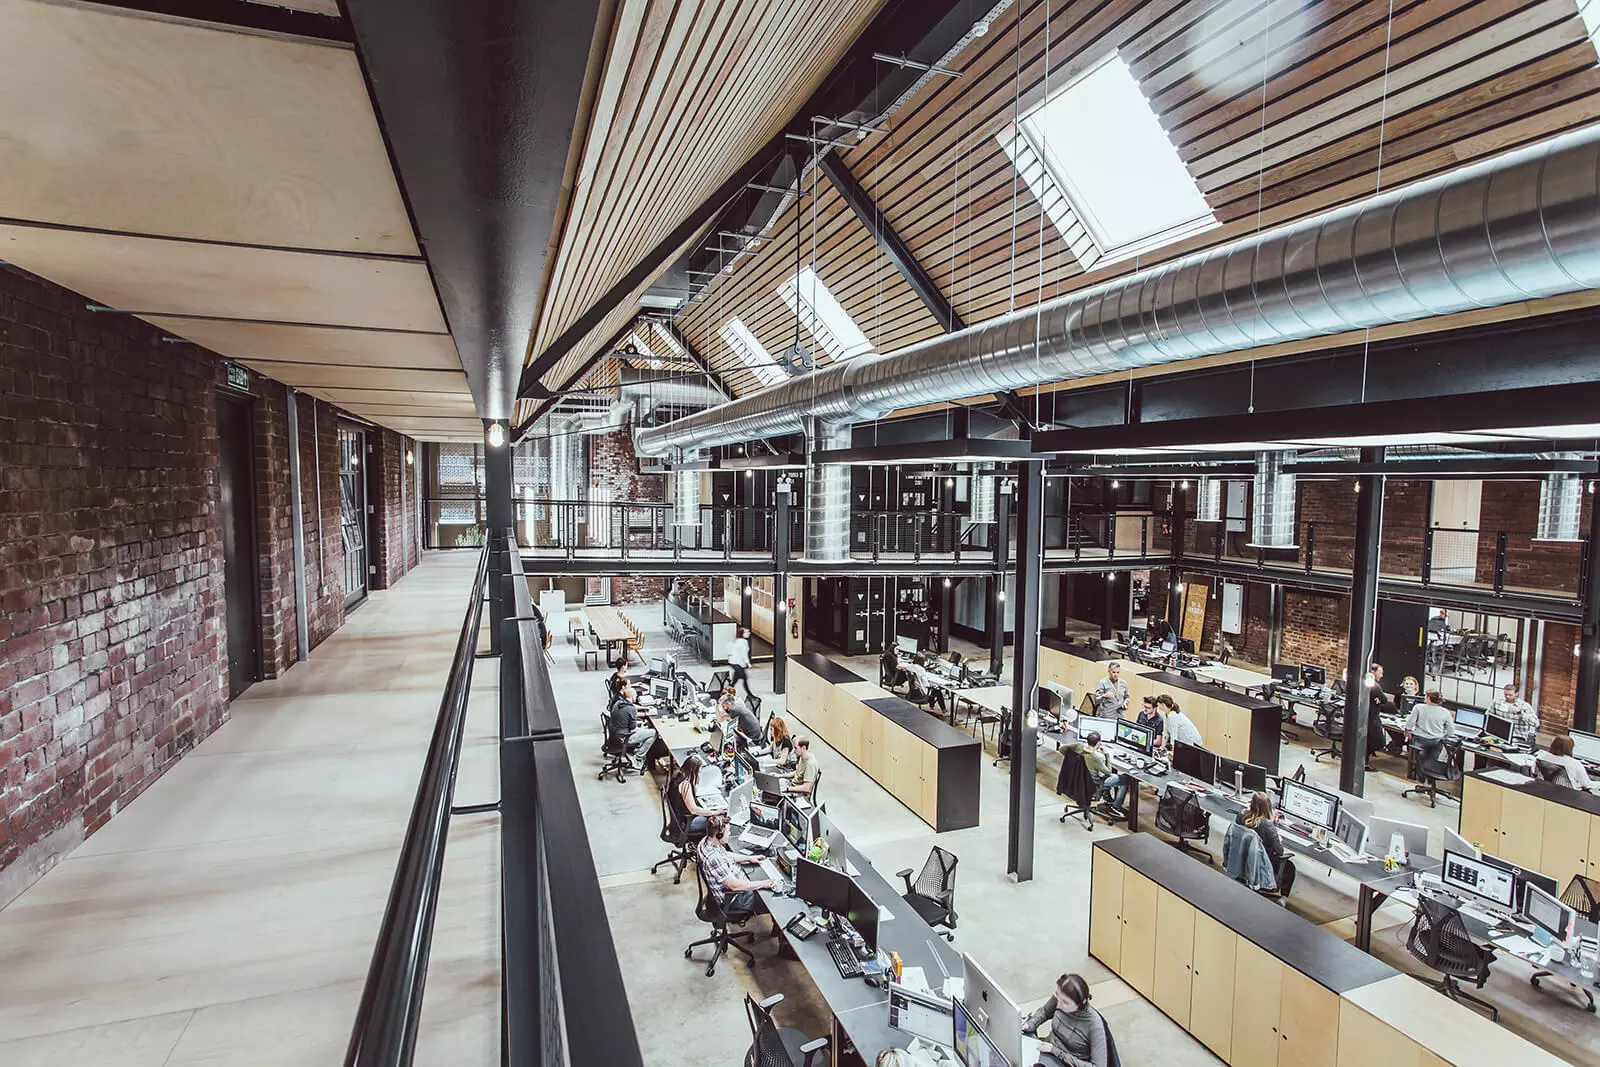
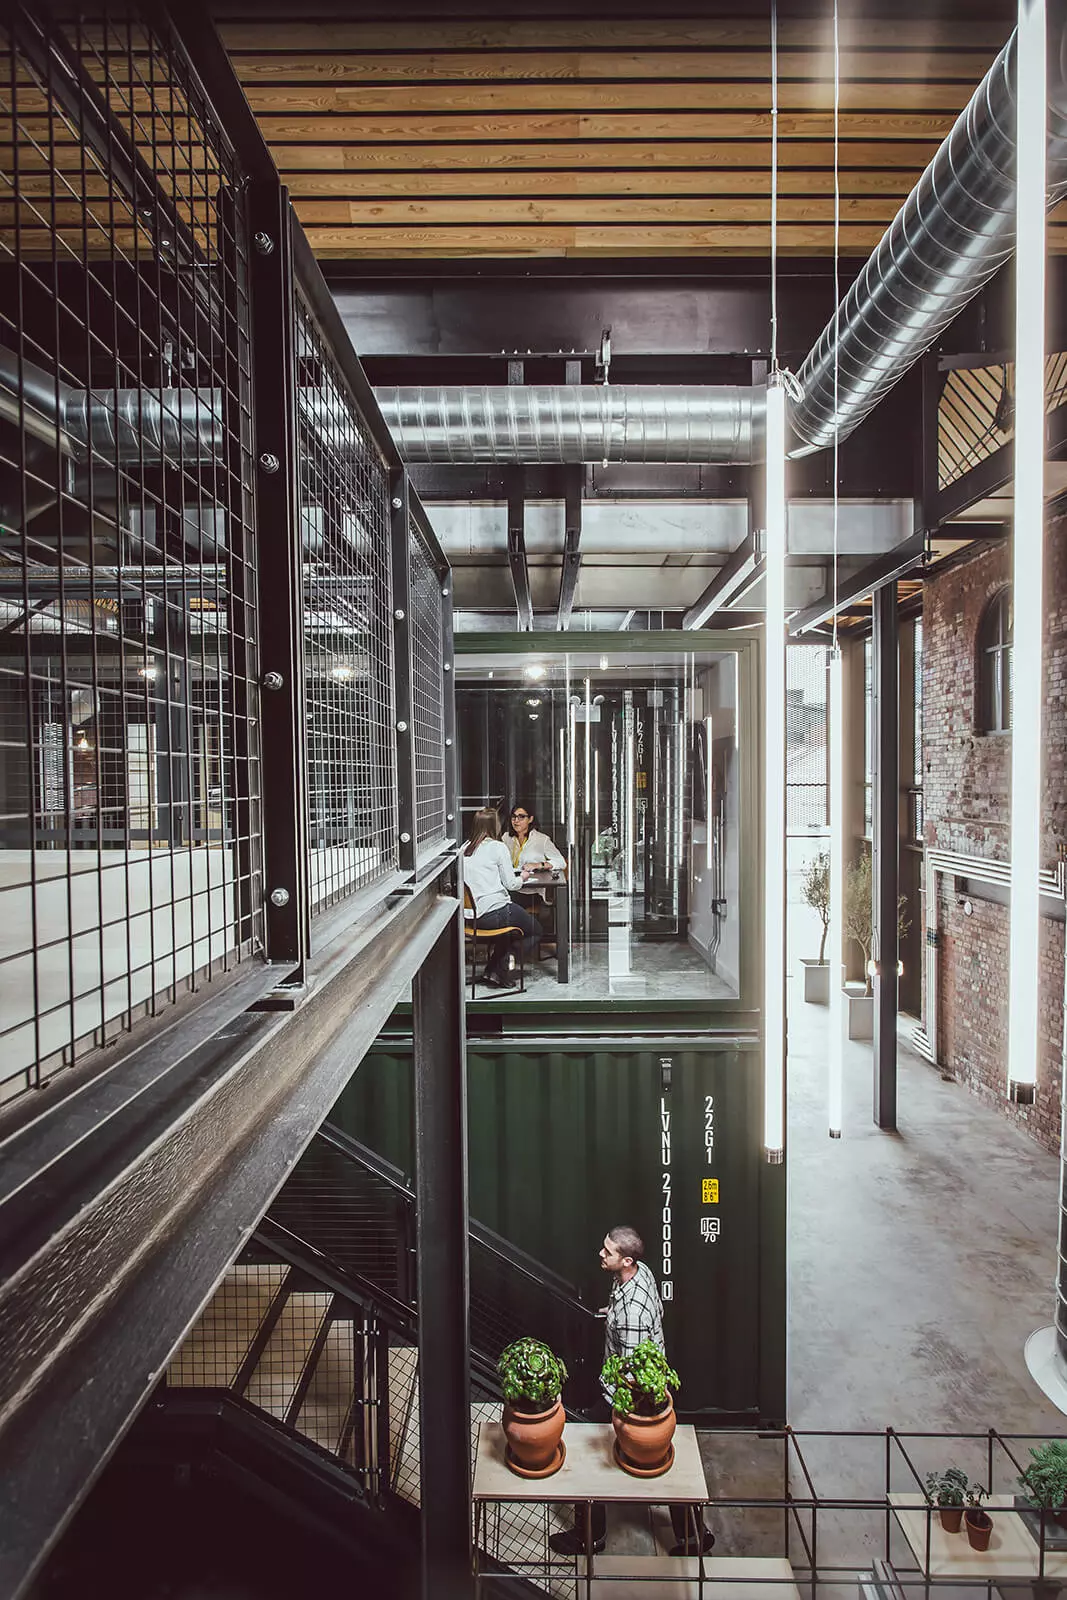
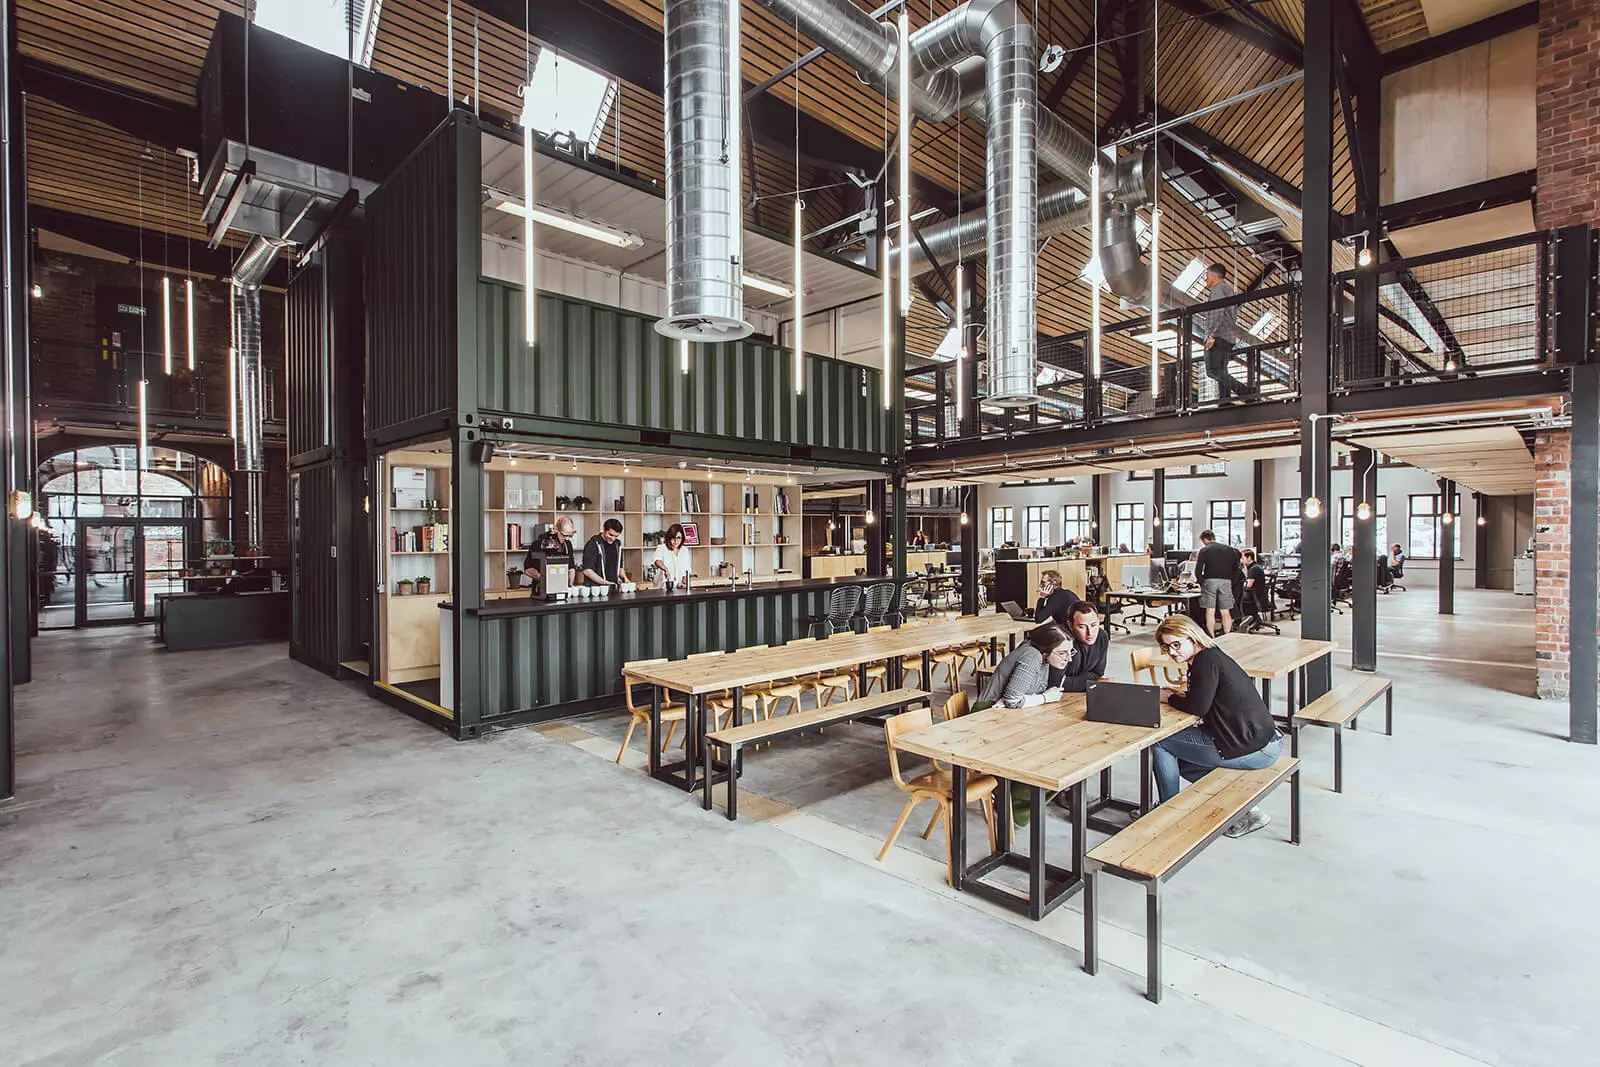
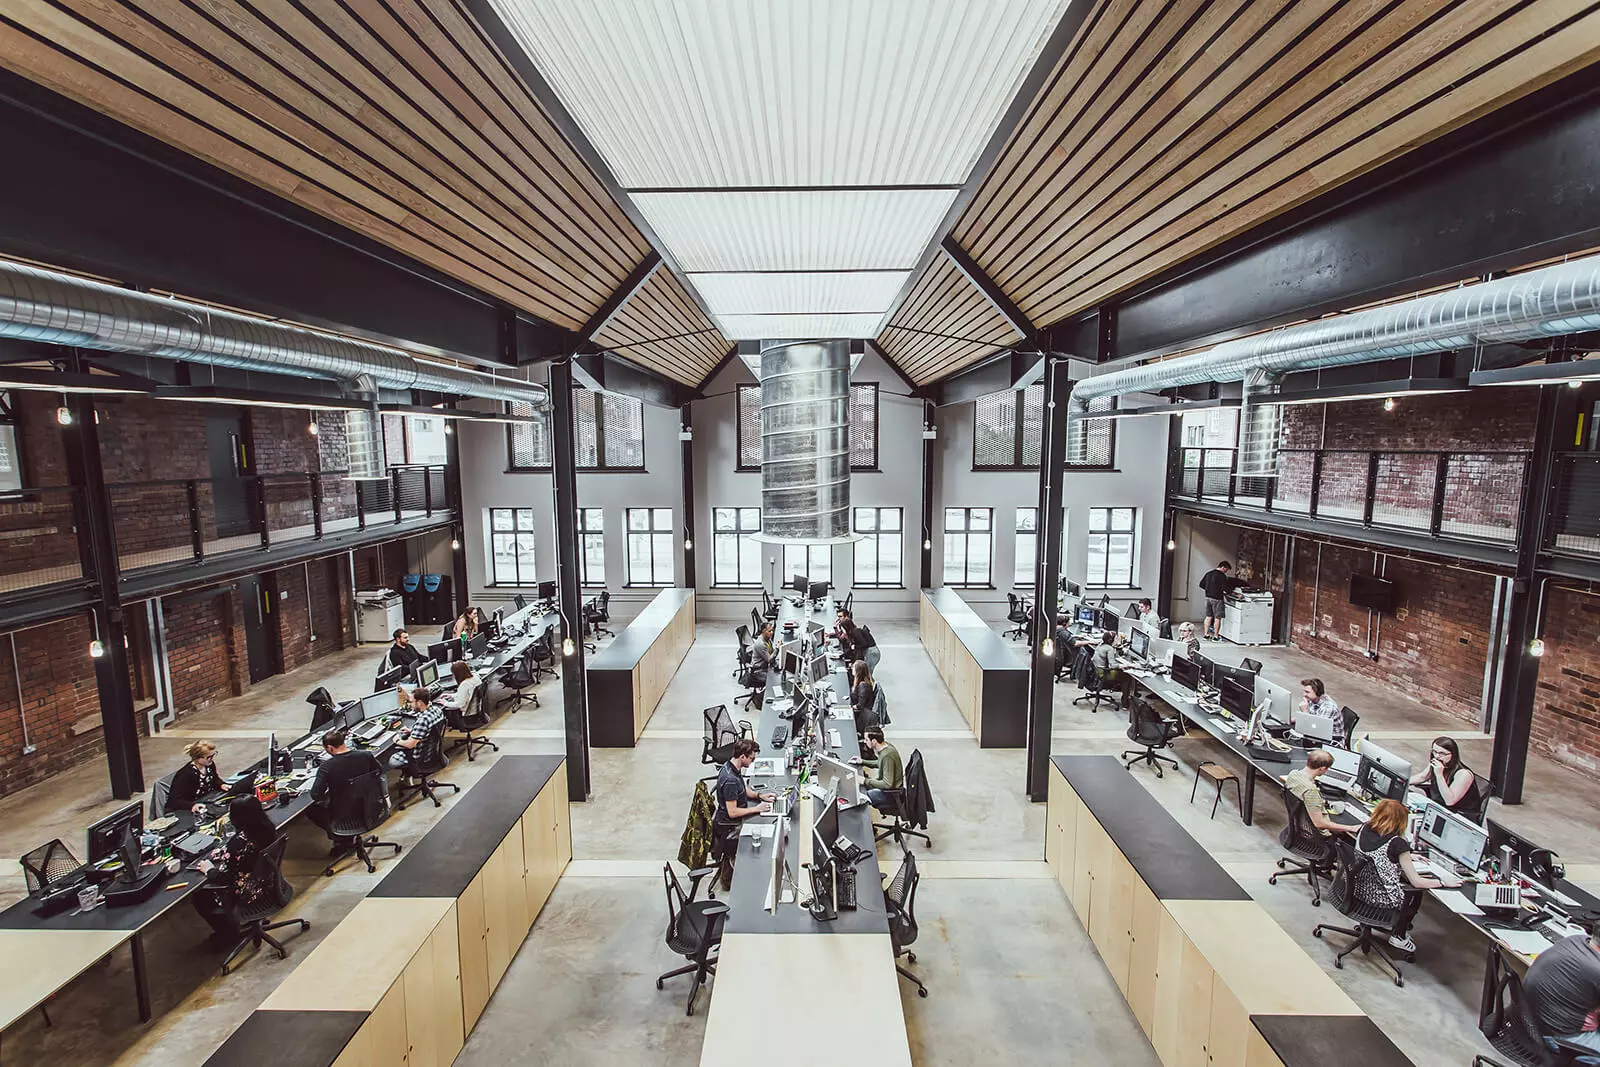
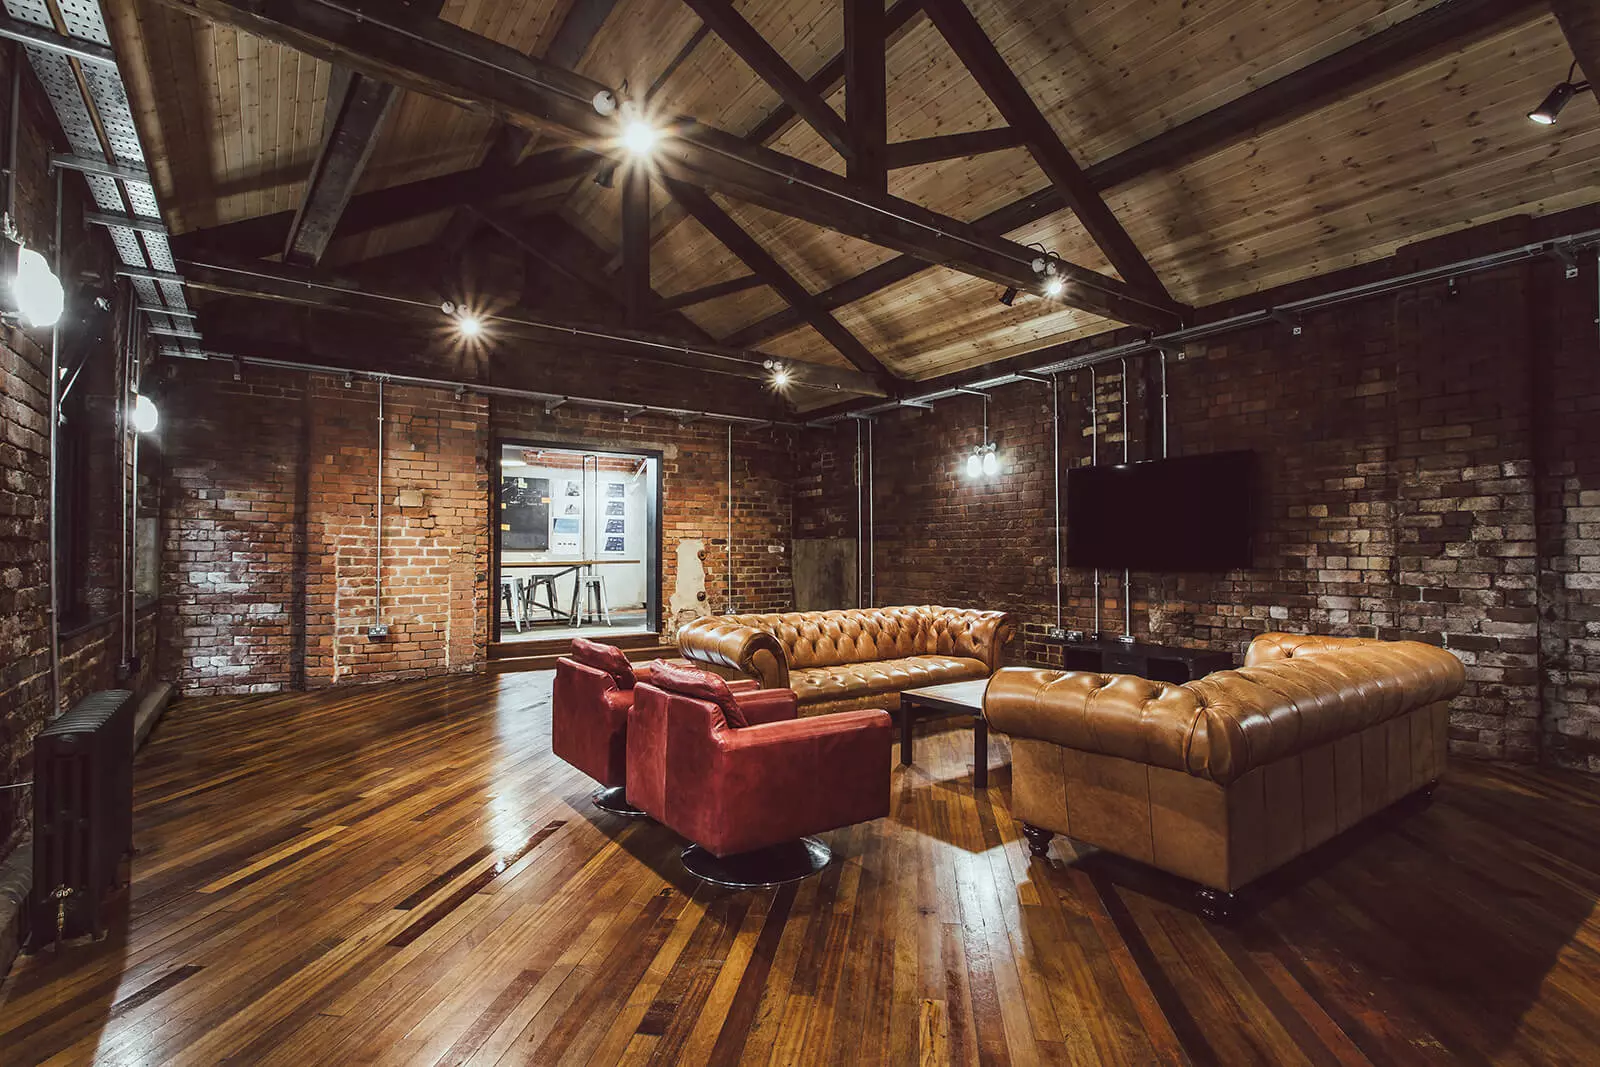
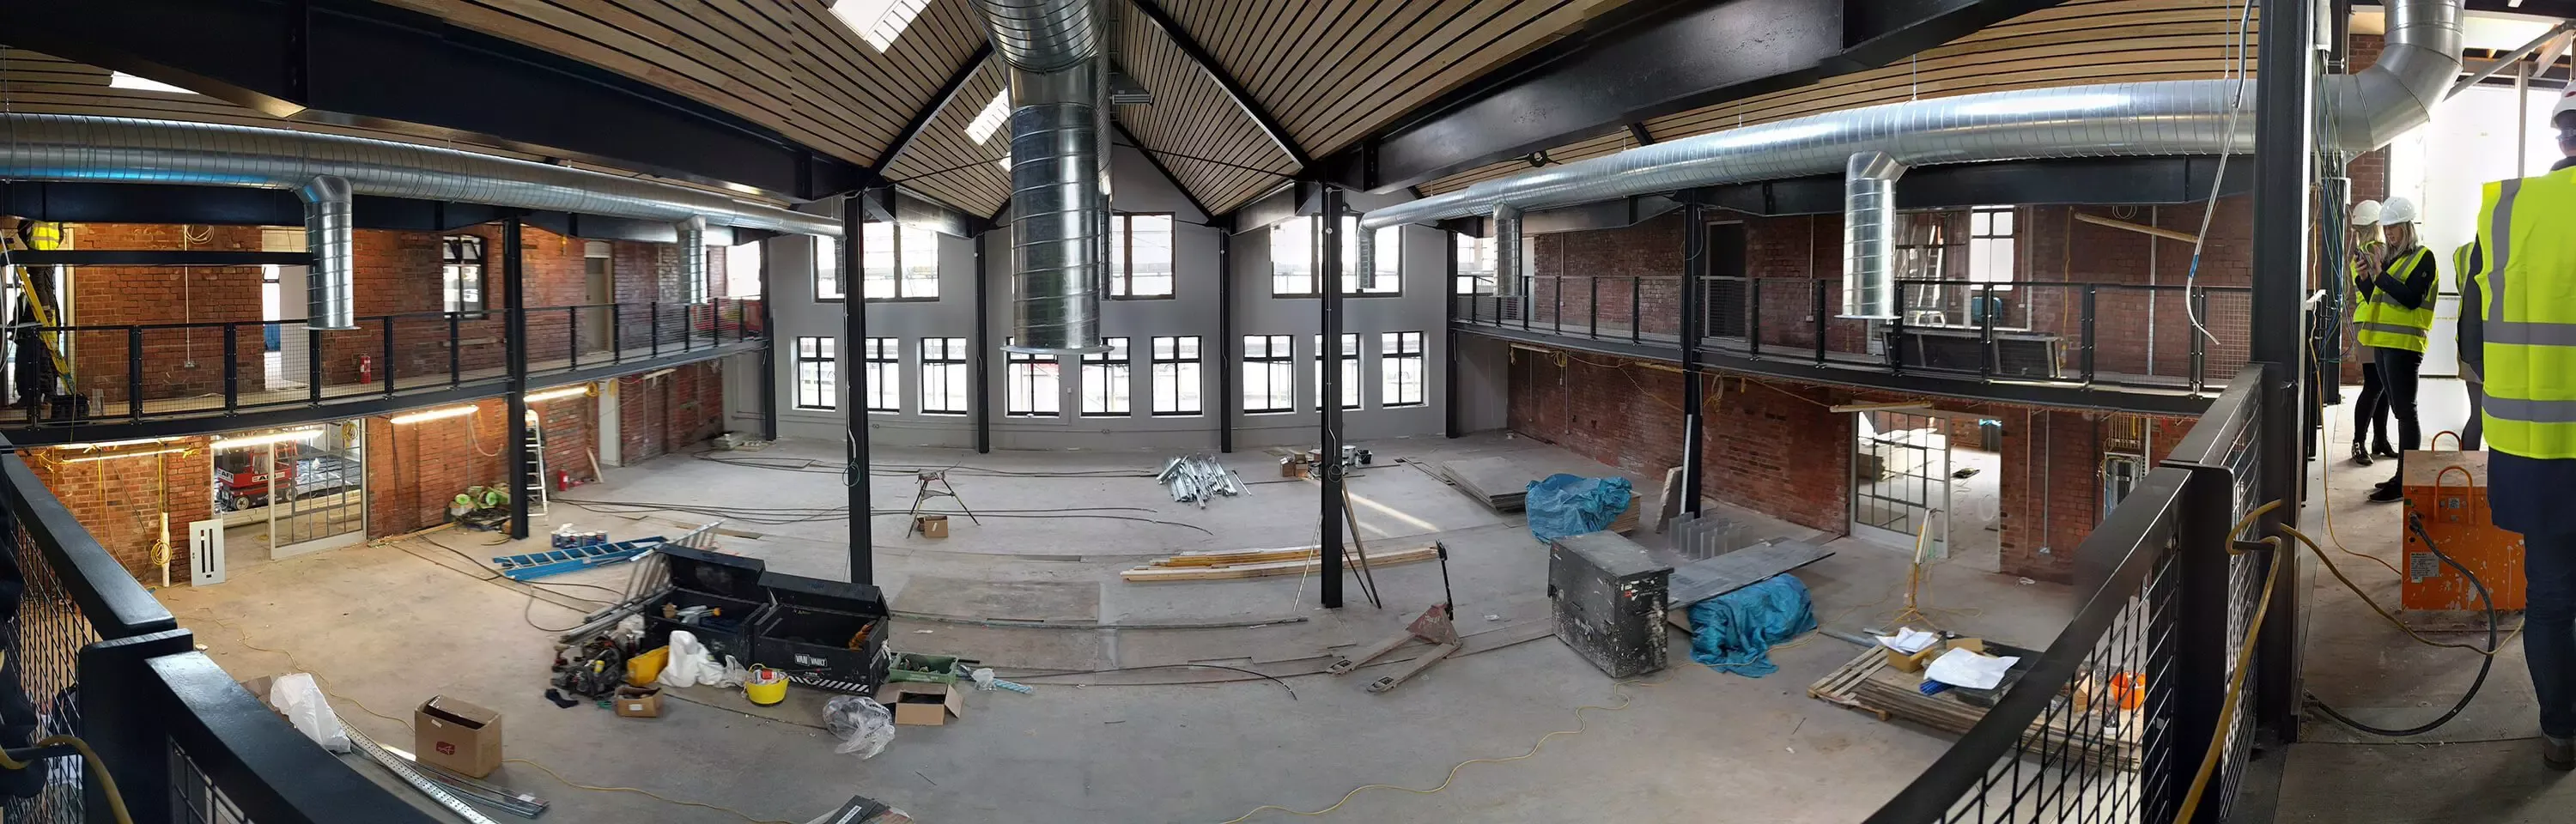
Bonus: Here are the photos of the finished office.